Drawing dogs is a joyful and satisfying artistic challenge that appeals to people of all ages and skill levels. Whether you’re an aspiring artist, a student working on a project, or simply someone who loves dogs, learning how to draw a dog can deepen your understanding of animal anatomy, observation, and creative expression. In this comprehensive guide, we’ll walk through the process of drawing a dog step-by-step, from basic shapes to finishing details, as well as tips for capturing the unique character and features of man’s best friend.
Essential Materials for Drawing a Dog
Before you begin, gather a few basic art supplies:
- Sketching pencils (HB for sketching, 2B-6B for shading)
- Eraser (kneaded or vinyl)
- Drawing paper or sketchbook
- Blending tools (tortillon, blending stump, or tissue)
- Ruler (optional, for guidelines)
- Colored pencils or markers (optional, for finishing touches)
Step 1: Observing and Understanding Dog Anatomy
Successful dog drawings start with a basic understanding of canine anatomy. Study reference images or observe real dogs:
- Note the proportions of the head, body, legs, and tail.
- Observe how joints bend and how fur changes with movement.
- Identify breed-specific features (ear shape, muzzle length, coat texture).
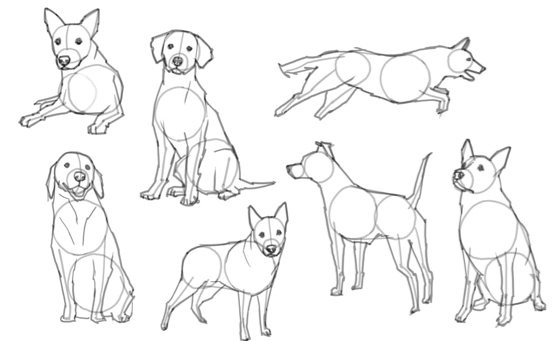
Step 2: Sketching the Basic Shapes
Begin with simple shapes to establish the dog’s pose and proportions:
- Draw an oval or circle for the head.
- Add a larger oval for the body, positioned at the correct angle.
- Use light lines to mark the center of the face and body.
- Sketch lines or circles for the legs, paws, and tail. This framework acts as a guide for adding details later.
Step 3: Outlining the Body and Head
Using the basic shapes as a guide:
- Refine the outline of the head, connecting the snout to the main head shape.
- Add the ears, noting their placement and shape (floppy, pointed, etc.).
- Define the neck and connect it to the body.
- Outline the legs, noting where joints bend, and sketch the paws at the ends.
- Add the tail, considering its thickness and curve.
Step 4: Drawing the Face and Features
The dog’s face is the focal point and brings your drawing to life:
- Draw two eyes, spacing them evenly on the head.
- Add the nose at the end of the snout, usually shaped like a rounded triangle.
- Draw the mouth, starting with a gentle curve or line beneath the nose.
- Add eyebrows, whisker spots, and other expressive features.
- Refine the ears, adding inner details for depth.
Step 5: Refining the Outline and Erasing Guidelines
At this stage:
- Go over your main outlines with a darker pencil or pen.
- Erase unnecessary construction lines and guidelines.
- Make small corrections to improve symmetry and proportions.
- Start to indicate major fur patterns or markings.
Step 6: Adding Fur Texture and Detail
To make your dog drawing more realistic:
- Use short, directional pencil strokes to mimic the flow of fur.
- Layer strokes for areas with longer or thicker fur.
- Pay attention to changes in fur direction, especially around the face, ears, and tail.
- Add shading to indicate volume and light source.
Step 7: Shading and Finishing Touches
Shading gives your drawing depth and realism:
- Identify the light source and shade the opposite side of the dog’s body and face.
- Use blending tools for soft transitions in shadowed areas.
- Darken areas like the nose, eyes, and inside the ears for contrast.
- Add highlights with an eraser for shiny spots on the nose or in the eyes.
- Consider adding a simple background or ground shadow to anchor your drawing.
Tips for Drawing Different Dog Breeds
Every dog breed has unique features. Here are a few tips:
- Short-haired breeds: Use shorter, smoother pencil strokes.
- Long-haired breeds: Layer longer, flowing strokes and add volume.
- Puppies: Heads are larger in proportion to the body, with rounder faces and bigger eyes.
- Distinctive features: Focus on things like a Pug’s wrinkles, a Dachshund’s long body, or a Husky’s pointed ears.
Common Drawing Challenges and Solutions
- Proportions: Use reference images and measure with your pencil to check relative sizes.
- Symmetry: Draw guidelines for the face to keep eyes and ears balanced.
- Expression: Observe real dogs or photos to capture subtle differences in emotion.
- Fur Texture: Practice different stroke techniques and be patient—fur takes time!
How to Draw a Cartoon Dog
For a fun twist, try drawing a cartoon-style dog:
- Use exaggerated features (big eyes, oversized paws, expressive eyebrows).
- Simplify shapes and lines.
- Add playful accessories, like a collar or tongue sticking out.
- Experiment with vibrant colors and outlines.
Using Reference Photos and Real Life Observation
- Always work from good-quality reference photos when possible.
- Observe real dogs for movement, posture, and personality cues.
- Take your own photos of dogs in different poses for original inspiration.
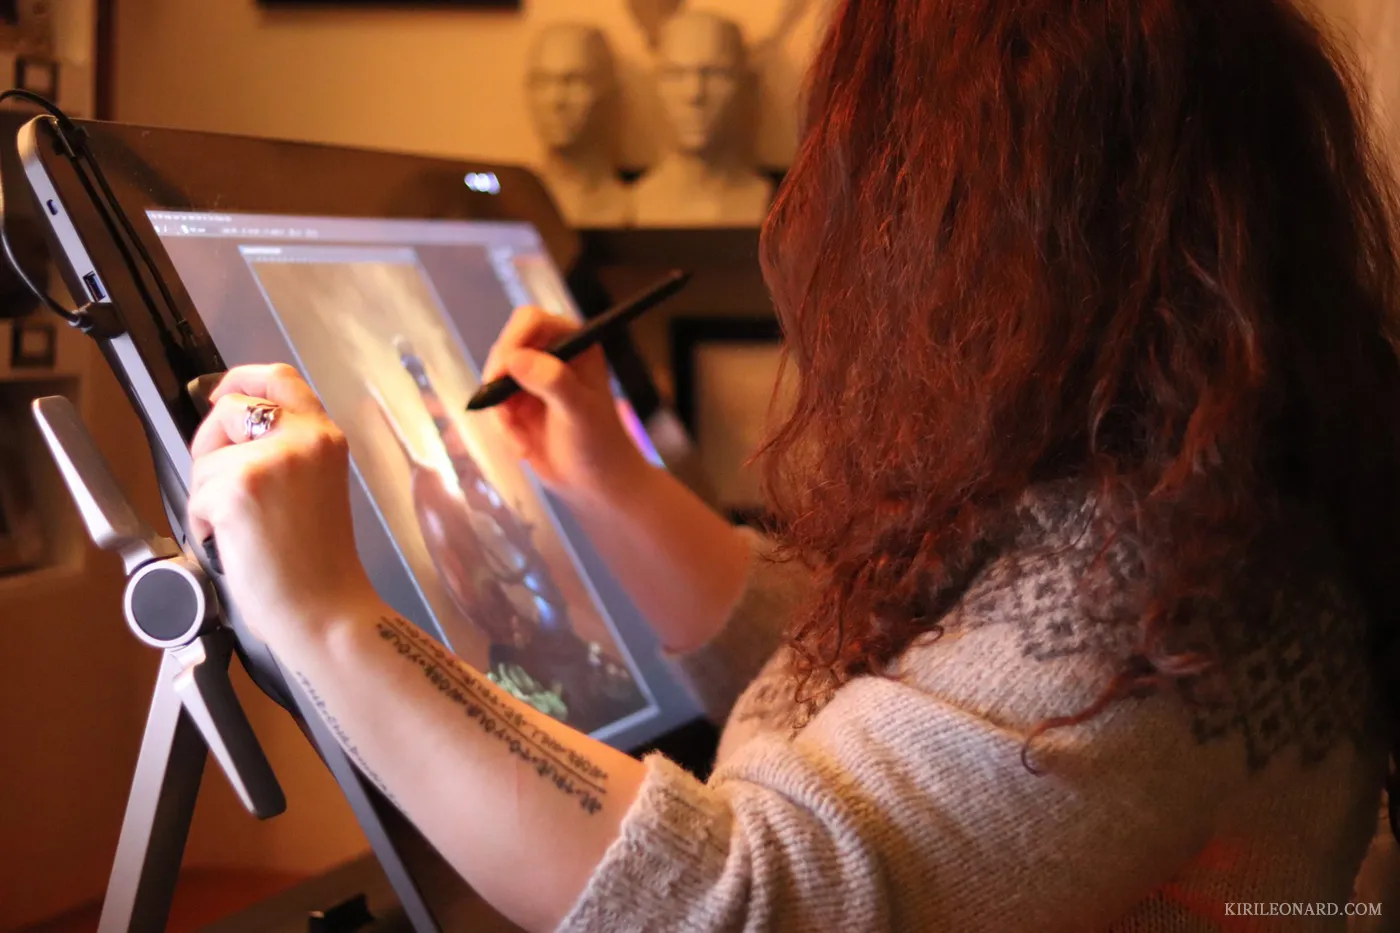
Digital Dog Drawing
If you prefer digital art:
- Use a tablet and stylus with drawing apps like Procreate, Krita, or Adobe Fresco.
- Take advantage of layers for construction, outline, color, and shading.
- Experiment with digital brushes for different fur textures.
Frequently Asked Questions
Q: How long does it take to learn how to draw a dog? A: With regular practice, noticeable improvement can happen in a few weeks. Mastery takes time, so be patient and enjoy the process.
Q: What’s the best way to improve my dog drawings? A: Draw regularly, study canine anatomy, use references, and seek feedback from other artists.
Q: Can I draw my own dog? A: Absolutely! Drawing your own pet is a great way to capture their unique features and create a personal keepsake.
Conclusion
Learning how to draw a dog is both rewarding and fun. By breaking the process down into manageable steps and practicing regularly, you’ll be able to capture the spirit and beauty of dogs in your artwork. Remember, every drawing is a chance to improve, experiment, and express your creativity. So grab your pencil, find a canine muse, and start sketching your own masterpiece!